Marc Robic’s DIY: Upgrading from manual to electric head
June 24, 2021
The finished installation
As bareboat charterers for many years now, most boats we’ve had the pleasure of renting had an electric head. Much to our enjoyment and that of our fellow passengers, they are super simple to operate and explaining how to use them is a breeze. Plus it’s a whole lot more pleasant than facing the bowl to pump!
On our boat in Montreal, we very much enjoy entertaining family and friends on board. Besides going over important safety measures with first timers, explaining how the manual toilet works has always been an unpleasant chore, as well as embarrassing to our guests when something goes wrong or was not clearly understood. Embarrassment made worse, when I can hear that they have not pumped enough to ensure all waste matter has made it to the holding tank.
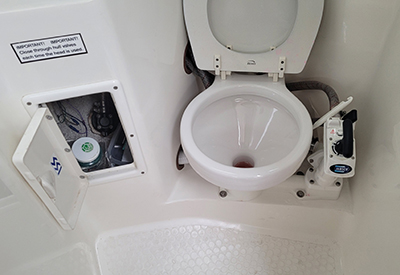
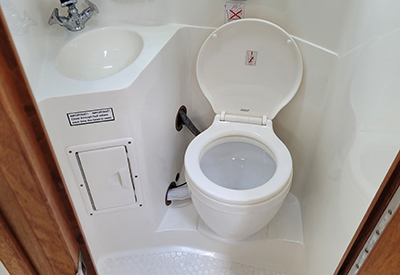
Original Manual Toilet
Having a simple and efficient electric toilet was my long awaited solution. Like our icebox to fridge conversion two years ago, this upgrade definitely ranks among the top five we’ve undertaken.
For the better part of two years, I researched the many manufacturers, models and options. Although there are many to choose from, I selected the Jabsco Lite Flush toilet with optional wall mounted control panel.
My choice was guided by three main factors: 1. My manual head was also a Jabsco and the Lite Flush electric toilet is an exact footprint match, using the same attachment points 2. I had read a few negative comments but after calling Jabsco directly in Maine, they assured me that these issues have all been resolved and many other improvements added. And 3. The relatively easy installation.
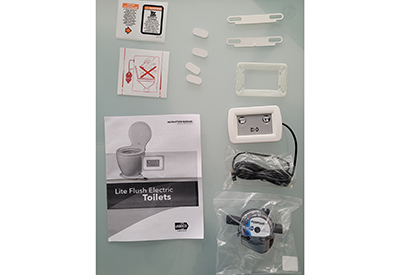
what’s included
The Lite Flush is a simple 2-step system. Press the first button to add water (about ½ a litre) and, when finished your business, press the second button. It will add another ½ litre of water then the built-in macerator and pump do the rest, making sure all “matter” has been pulverized and sent to the holding tank. Could not be simpler or more convenient.
Another not to be neglected decision factor is the easy access to Jabsco replacement parts and technical assistance.
Once we chose this model, we had our local boat supply store, The Boathouse in Dorval (Montreal), order it for us. The unit arrived in early May and included all the hardware needed. A few noteworthy items include a serviceable water inlet inline filter and an anti-slap seat and lid. So, no more awful “bang” sounds when someone forgets to close the lid before or while sailing.
Because I knew I was going to install the toilet once the boat was launched, I made sure the water intake seacock was closed prior to launch, so that when cutting into the inlet hose, it would not create extra water clean-up.
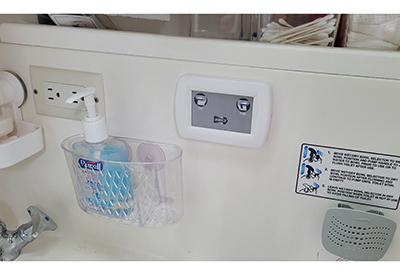
Mounted control panel
My wife and I had discussed and agreed where the best location would be for the control panel and since our Catalina had a discharge macerator (which was condemned when she arrived in Canada) I already had power close by, with the right wire gauge and circuit breaker amps.
Installation was very simple and took about 2.5 hours and the final look is clean, sleek and functional.
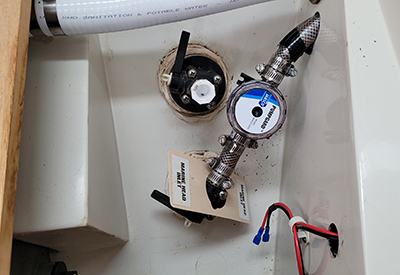
inlet water filter
As a side note, I cannot stress enough, that any and all your water related hoses onboard must have two hose clamps. This is an absolute must and these should be inspected at least once a year and replace or fix any damaged clamps or hoses as needed. Such a small thing, but it will prevent showing up at the club and seeing only the top part of your boat sticking out of the water!!!
Here is a link to Marc’s extremely well done installation video.
Marc Robic
Marc is a member of the Canadian Power & Sail Squadron. He and his wife, Claude sail their Catalina 270, Aquaholic 3, out of the Ile-Perrot Yacht Club in Montreal, where Marc spent 16 years as Harbour Master. They are regular Caribbean bareboat yacht charterers. With over 40-years experience, Marc is also an avid do-it-yourselfer.
