Sail Techology: Pre-Season Sail Inspection
Mar 16, 2022
Many sailors get their sails into the sail loft for inspection at the end of the sailing season for a professional inspection, recuts and repairs. The sailmakers can quickly assess the condition, get the sail hung up on their pulling rig, check the shape of the sail, and easily take care of damaged stitching, or even impending doom scenarios such as head rings tearing out. Our loft is very busy with this kind of work starting in October and don’t find the end of the service pile until the end of May.
What do you do if you missed getting them into a sail loft? Get your eyeballs on those sails before the season starts!
Unless your basement is larger than mine, see if you can spread out the sails on a clean piece of deck or clean up an area where you can at least stretch out the foot length of the sail. Most boats need a clear area of about 6m x 2m (20’ x6.5’). Make sure the area has no possible sharp edges, sail seams can get damaged by even a small staple or splinter.
Mainsails get damaged in very specific areas and there are generally many pieces of hardware on the sail to get damaged. We always start with the luff and check the slides and/or boltrope, and make sure the webbings or shackles are in good condition. It is a good idea to replace slides (flat shaped) or slugs (round shaped) whenever you see any gouges or wear. The boltrope also tends to shrink with age making the sail hard to hoist and set with more depth than intended. Loosening this rope off is a loft job and requires a pulling rig to get the boltrope released and reseized.
Figure 1 – Mainsail Wear Points
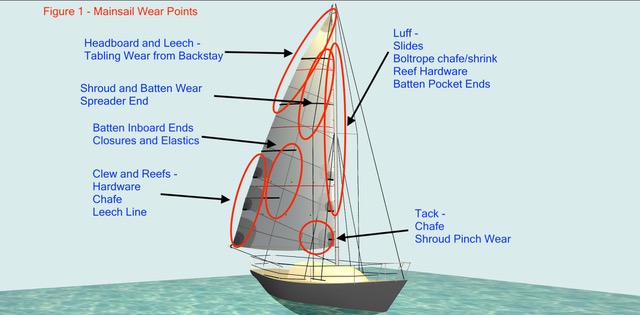
The tack area of mainsails see a significant wear from pinching between the boom and shroud, and wear at the tack fittings. The clew area gets chafe from reefing and there are cleats and leech tablings that see significant wear. Batten ends also get worn and sometimes the internal fastenings are elastic which has a limited life and need to get replaced when they lose their spring. We also look closely at spreader wear and along batten pockets that touch shrouds. Often the pockets can be worn through at these spots and the battens can also get damage there. The last section to go over is the leech edge up to the headboard where the sail may hit the backstay. In some cases, the headboard can also hit the backstay indicating the sail is getting overhoisted to make up for poor shape.
Headsails have some of the same wear points, but most damage occurs in the leech and foot area.
Figure 2 – Headsail Wear Points
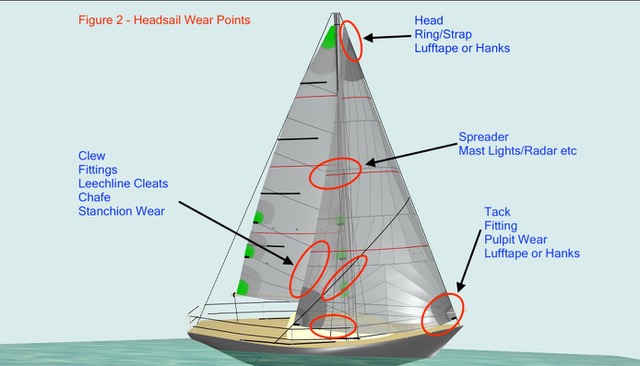
Always inspect all the corner rings or loops, these tend to wear out especially with furling use. The spreader impact area is a significant damage area as well, and includes mast lights, radar antennas, or other things that sailors add to the front face of their mast just to damage sails! The clew area tends to get compromised by flogging the sail and tacking. Working forward along the foot look for stanchion wear and then pulpit wear as you get to the tack. Many newer boats have unfortunately designed step through bow pulpits that are also excellent and hooking the foot of the sail around when you trim in the sail from a broad sailing angle. This can stress the tack and cause some strange damage doing this.
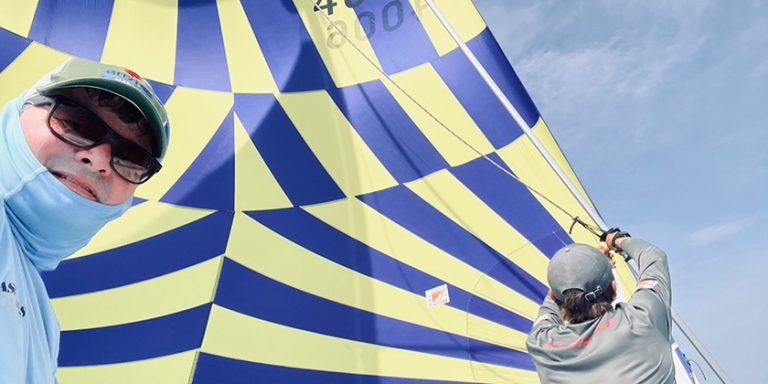
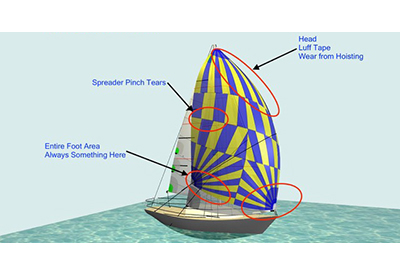
Spinnakers are quite difficult to inspect on your own if you can’t hang it up and walk around under it to see holes and stress marks up against a bright light. The head area often gets damaged from hoists and douses so take a close look here. The tack area also gets lots of wear from bow pulpits and handling as does the clew along the foot. There will definitely be something in the bottom 2m of the foot of just about any spinnaker.
Figure 3 – Spinnaker Wear Points
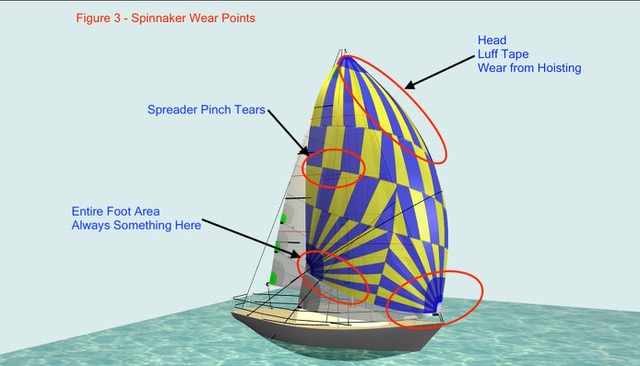
The last area that can get some large tears from use is the spreader pinch area. Sometimes this area of the spinnaker can get pinched between the mainsail and the spreader, and lead to some nasty large tears or shredded spinnaker cloth. This is where most catastrophic large spinnaker “explosions” start from. A good preventative is to make sure your main trimmer pays special attention when the spinnaker is being set to avoid easing the mainsail too early which traps the spinnaker. Small pencil sized holes can be patches with a small piece of sail repair tape, but generally anything larger should get a let in window patch with cloth patch and sewing.
It can take a few hours to just inspect a set of sails, and several more to attend to small patches or replace some hardware, but at least you know your sails are in good shape to start the season.
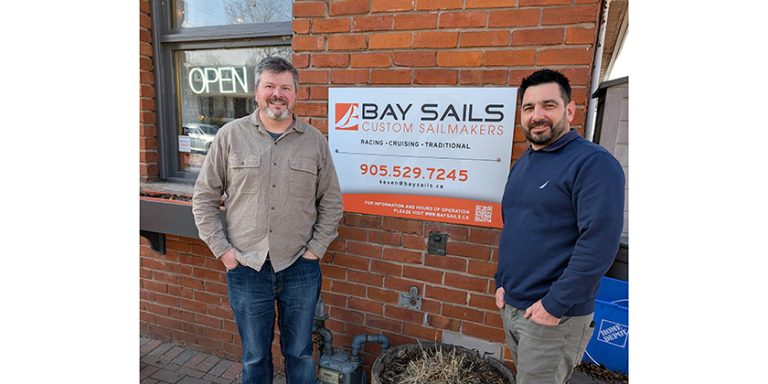
 Keven Piper, two-time Shark 24 World Champion, founded Hamilton, ON-based Bay Sails in 1998. Email: baysails@gmail.com