Converting onboard icebox into a fridge/freezer
Mar 8, 2021
By Marc Robic
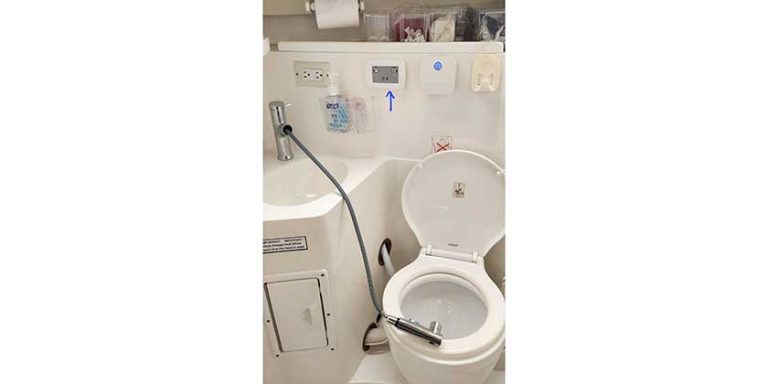
after installation, the cooling holes are visible on the right
The desire or rather, the argument, to convince my wife (AKA First Mate) to convert our icebox to a fridge came after our first two trips onboard our Catalina 270, Aquaholic 3, up to the Thousand Islands from our home port in Montreal.
Fully stocked, the need for proper planning of perishable items and those requiring constant cold or kept frozen is an important logistic and one extremely well managed by my wife (AKA, Onboard Chef extraordinaire). However, the constant need to plan when and where to get more ice was a daily task that pretty much dictated where our next stop, detour or destination needed to be. The state of “coldness” of food items in the ice box also dictated the day’s menu!
Luckily, we do travel with our tender to go ashore for ice and other provisions. No need to find and go into marinas or yacht clubs with the mother ship every day. With just a regular ice box and the warm summer temperatures, our ice trips were often daily morning and evening chores. Pus the important chore to remember draining the ice box and the extra cooler we had to bring along, which took too much space for my liking.
 Cabinet before installation
When I first started bareboat chartering in the Caribbean, the industry was relatively still new with a limited selection of boats available and even less so for those with onboard refrigeration so, the aforementioned “ICE” hardship was not new. However, during the last 15 years or so, every bareboat we’ve chartered, mostly catamarans, have had onboard refrigeration. Some of the bigger cats also had generators to power up and recharge the batteries, keeping the fridge and freezer going. We still had to remember to start the engine or generator at least one hour, twice every day, to maintain the batteries and refrigeration.
So, we know firsthand the pleasures of spending two weeks sailing and island hopping in sunny 85/90 degree weather without concern for ice and the pleasure of staying on our planned itinerary. Cold drinks were readily on hand 24/7. We did experience fridge failures on some boats and loss of some food items but with our “glass always half full” attitude, those experiences turned into positives as they played a role in how we were to plan our conversion project.
First thing was to set our priorities and objectives: we wanted the ability to start the fridge from spring launch to fall haul-out and keep it stocked with food and drink without having to bring a cooler every time. Since our club does not have shore power (which I prefer) and we cannot be at the club everyday to start the engine in order to recharge the batteries, the fridge had to use as little power as possible so that a solar charging system can keep it going 24/7 and keep the batteries fully charged.
In 2018, NOVA KOOL, a Canadian manufacturer, had introduced a new conversion kit that uses less space, less power and delivers remarkable performance. While in Vancouver, I visited Nova Kool where they gladly gave me a tour of their plant and explained their product selection, options, consumption and performance. They also reviewed my ice box shape and dimensions and provided me with best options.
The model that checked all our boxes was the LT201 with the medium size evaporator plate (model FM). The LT201 compressor unit is only 9” wide, 11” long and 7.5” high. A very small foot print for such a powerful and efficient unit. Plus all Nova Cool kits are designed to use 12 or 24 volts with no modifications. Once installed (12 volts in our case) this unit has been consuming only 1.8 to 2.2 amp/hour and runs on average 2 ½ – 3 times per hour for only 3 to 4 minutes each time and maybe once every 1 ½ hour after sundown and overnight. So, with a 200 Watt solar panel system, there is no issue. The solar panels power the fridge and feed the house battery during the day. The low consumption and minimal operating times means the house battery has no problem powering the fridge all night with plenty of power left come morning. Needless to say, the amount and quality of the ice box insulation also contributes to the above performance. More on that later in the article.
With the conversion model and evaporator option selected, we called and had our local chandlery order these for us.
We now turned our attention to installation and how to optimize efficiency. The location we selected is in the cabinet under the galley sink, which is right next to the top loading ice box. So the compressor unit would be less than 2 feet away from the evaporator plate in the ice box.
Note that Nova Kool conversion kits come standard with 15’ of coolant lines and an on/off thermostat. Depending on the distance needed between the compressor and ice box, shorter or longer lengths can be custom ordered from Nova Kool via your local chandlery.
This location provided relatively easy access to the outside of the ice box by unscrewing the panel inside the cabinet and pulling it away. From this vantage, I was able to add extra insulation using low expansion spray foam. Once cured, it was easy to cut and trim the foam as needed. While the foam was curing, I installed the cooling plate. To do so, I used a broom stick to help (gently and slowly) bend the plate to shape and cut away one of the corners, making sure not cut or damage any of the coolant channels. Cutting the lower corner was necessary in order to slip the plate into the ice box opening. The installed cooling plate covers two walls of the ice box. Note that all installation hardware comes with the conversion kit including the important nylon spacers between the cooling plate and the ice box wall.
Since the bottom of the cabinet and the area behind the panel are exposed to the hull below the waterline, where cooler air resides, I drilled out 3” holes adjacent to where the compressor fan will be able to pull the cooler air thru its mini radiator. Since the warmer air created by the compressor rises, I added three exhaust vents on the top of the cabinet, just above the door. This really performs well and ensures the compressor will never overheat.
The Nova Kool unit does come with safeguards. For example, it will shut off if the battery goes below a certain current, making sure it does not drain the battery completely. You can also make power / performance configuration changes which are very well explained in the installation/owner’s guide.
In lieu of connecting the compressor directly to the house battery or the main fuse panel, I connected it directly to the accessory output of the solar controller with an inline 15 amp fuse. The solar controller’s charge output is wired to the house battery (Batt 1). Having this installation has three benefits: 1 – I can monitor the current (amp/hr) being used by the compressor on the solar controller screen, 2 – It isolates the engine battery (Batt 2) should for some reason the solar charging system not work and 3 – If the controller senses lower voltage from the battery, it will turn off the fridge (accessory output) preventing a complete battery drain. Once the battery power is back up to a sufficient level, it will turn the fridge back on. This also ensures that Batt 2 is isolated and will always be ready to start the engine.
This set-up also provides two points where the fridge can be turned on or off. On the thermostat inside the fridge and on the solar controller panel where there is a manual switch to turn on/off the accessory output.
Another useful modification was to the shelves inside the ice box. Like most ice boxes on boats, there is an upper and a bottom section. These sections are divided by shelves with many 1” holes. This allows for the heavier colder air produced by the evaporator plate to go to the bottom (also called the Spill Zone) and the lighter (less cold) air stays on the upper section. Admittedly, it took some trial and error during the first season to find the sweet spot on the thermostat’s 10 scale dial where it keeps items on the bottom section frozen (like ice, steaks, etc…) while keeping all the items on the top section very cold. In our case, we found the perfect setting is between 3.5 and 4.
 Inside the icebox after conversion
Lastly, it is important to be aware of utilization. Meaning, when we know we will be away from the boat for two or more days, therefore we will not be opening and closing the fridge, we lower the setting to 3. This ensures that the items on the upper section do not freeze. We learned the hard way, when we showed up after being away for five days and found our beer was frozen! Only once we arrive back onboard, we raise the thermostat, which compensates for the frequent opening and closing of the fridge.
All in all, this was an easy project, very affordable and a definite game changer as far as making outings much more enjoyable.
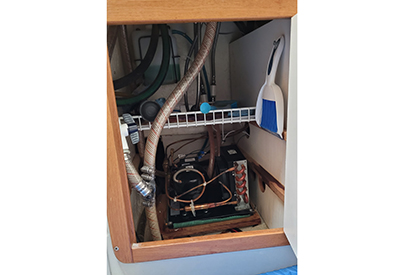
 final installation: neat and tidy
Information resources:
https://www.novakool.com/conversion-units-info
https://www.boathouse.ca/
Marc Robic
 Marc and Claude
Marc is a member of the Canadian Power & Sail Squadron. He and his wife sail their Catalina 270, Aquaholic 3, out of the Ile-Perrot Yacht Club in Montreal, where Marc spent 16 years as Harbour Master. They are regular Caribbean bareboat yacht charterers. With over 40-years experience, Marc is also an avid onboard do-it-yourselfer.
mrobic@aol.com