Electric Yacht Conversion – Part II
By Andrew McDonald
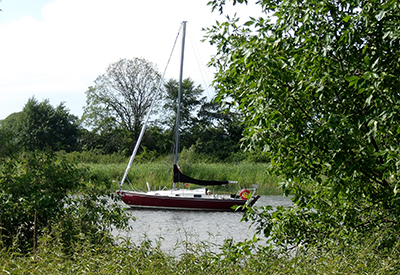
Svala at anchor.
This project started off in a way that many of us can relate to: Matt Bera and his family chose a boat that is perfect for them. The size, the handling, the design and the layout checked all of the boxes. What didn’t check out were the engine and the electrical – and they went ahead with the deal knowing that these were going to be issues to overcome. Despite quite a bit of research on Matt’s part, there were still a lot of blanks to fill in. In January of 2022, here’s what we knew:
- The boat was great, but the engine had major mechanical issues. These were possible to overcome, but the decision had already been made to replace the existing diesel with an electric engine
 A number of manufacturers had been reviewed and Matt made the decision to purchase from Electric Yacht.
- Electric Yacht crunched numbers on their end to determine the sizing requirements and provided data related to distance, speed and regeneration potential, specific to this application.
- Matt wanted to explore the use of Lithium batteries and wanted an overall system that allowed shore-power charging and the addition of solar panels for charging at a swing mooring, or while underway.
- Early on, Matt discovered that the marine industry remains far behind the automotive industry in terms of the acceptance of electric engines and for technicians interested in taking on conversion projects.
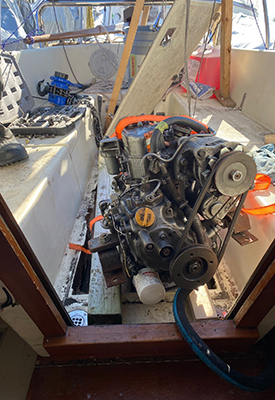
The old Diesel engine being removed
But as both a certified marine technician and an ABYC (American Boat and Yacht Council) certified marine electrician, I was keen to take on a project that involved the removal of a diesel and the installation of a new electric engine. Matt and I met onboard and compiled a list of some of the obstacles and challenges we would face:
- The 20-year-old, 3-cylinder diesel engine had to be removed and carted away. No power equipment (forklift, crane, boom truck or hydraulics) were available or accessible to the boat’s location. We’d have to creatively muscle the engine out its current position and offboard
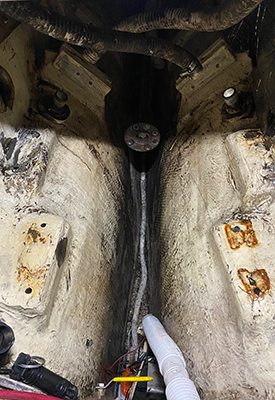
- The fuel tank (sitting below the cockpit floor) also had to be removed. It was hoped that this space could be used to install the batteries that would power the electric engine. The fuel tank was wider than the cockpit hatch, and its shape required that part of the cockpit floor would have to be opened up to allow it to be removed. Logistically, this had to be done first, because the coupler connections joining the engine shaft to the prop shaft sat directly beneath the fuel tank, with no access unless the tank was removed.
 I was conscious of available space; where could we mount the engine, batteries, display, controls and battery charger in a way that made sense? If we were going to overhaul these major components – let’s not sweat the small stuff. Matt made a commitment early on to do it right, or not at all.
the fuel tank as installed and being removed
- Supply chain issues: We were already aware of reported delays from the engine manufacturer. When planning began, we hadn’t settled on suppliers for the batteries, battery charger or solar panels. Once chosen, could we rely on the fact that orders placed in early February would arrive on time for installation and testing before launch in mid-May?
- Technical concerns: The engine is a 48V system. Is it better to use a single 48V battery, or 4 12V batteries? Since Lithium is a fairly new technology, which will perform best? How do we pair a charger with each battery layout option? What about solar panels? How do we integrate the current 12V DC system on the boat with a new 48V battery system for the engine? How do we manage battery charging for both the engine and house systems?
Optimism reigned and work began in late January. Sawzalls cut the cockpit floor and hammers rang against redundant through-hull fittings as demolition began. All traces of a diesel engine began to disappear: the fuel tank was manually drained and muscled out of a hole that was cut as small as possible to allow the tank to squeeze through. The engine was removed through the power of three determined men, a set of 2x4s, tie-down straps and a chainfall. All fuel, exhaust and water hoses were removed, along with the associated muffler, fuel-fill, intake and exhaust through-hulls.
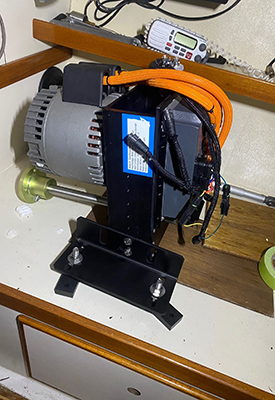
 The engine arrived on schedule. Weighing in at approximately 80lbs, it was possible to carry it up to the boat while in the cradle and muscle it into place. I was impressed to see how DIY-friendly the system was. Everything that is required comes in the kit; the engine, mounting brackets and feet, all hardware, electric display, throttle controls, main fuse block, main battery on/off switch and engine front casing. Because each installation is unique, the wiring is not included. During the planning process, I ordered the correct gauge wiring for our needs.
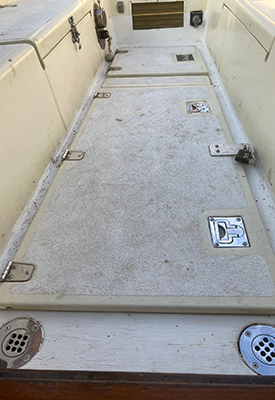
the cockpit floor had to be widened to remove the fuel tank. Here the hatch has been reinstalled after the new motor installation.
Our first snag hit during a February cold snap that lasted well into March: we found that the width of the engine mounts were wider on the original engine than on the Electric Yacht engine. This necessitated building up some fibreglass for the new engine mounts to bolt to.
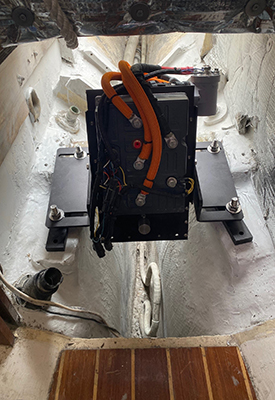
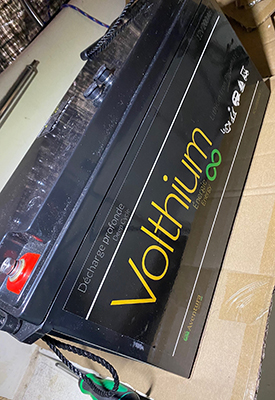
The final battery configuration was in a bit of flux, based on availability and timed arrival. The final configuration included 4 12V lithium batteries that were much larger (though lighter) than the standard 31 series batteries. Measuring in at approx. 20” long, 9” wide and 14” tall, they were tough to fit in our pre-planned locations, and it was harder still to find pre-fabricated battery boxes or trays to secure them in place. Our solution was more fibreglass work that involved creating flat plywood bases that could be fibreglassed to the curvature of the inner hull, providing a flat surface for mounting. Battery straps, and strips of oak were used to secure them in place, with rubber boots used on both positive and negative terminals. In the end, everything just fit – but took up a cockpit lazarette, in addition to the area where the fuel tank was originally removed.
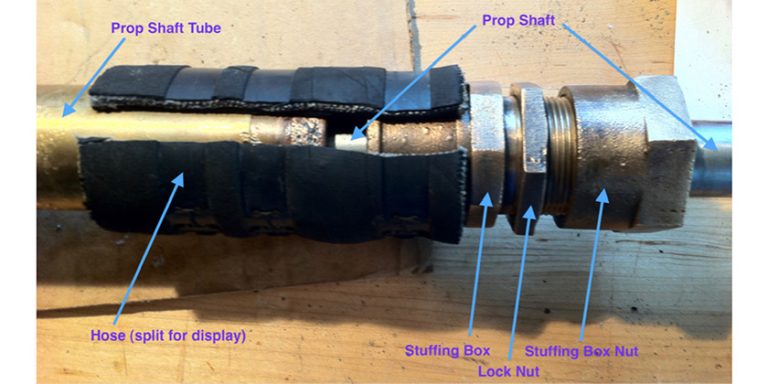
Once the weather broke in late March, fiberglass work continued in earnest. The cockpit was repaired, battery bases were installed and engine mounts were fitted and faired. Soon after, the engine, batteries, main fuse, main switch and cabling were all installed and tested. The engine was aligned, coupler bolts tightened, the stuffing box adjusted and she was ready for a sea trial. Slightly behind in terms of calendar days, but right on track in terms of labour hours, we were able to turn the key and perform checks and measurements while the boat was still in the cradle.
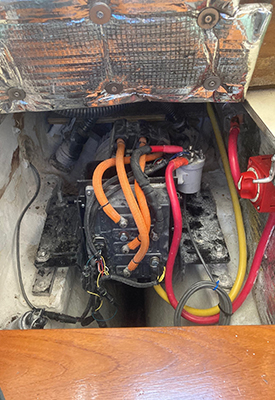
The final step in the project was to arrange the supporting systems: Because 4, 12V batteries were connected in series to provide 48V’s to the engine, the battery charger had to be capable of measuring and charging 4 batteries independently: so a 4-bank lithium charger was installed. A separate battery, mounting location, and charger were dedicated to the boat’s house DC system, isolated and distinct from the engine batteries.
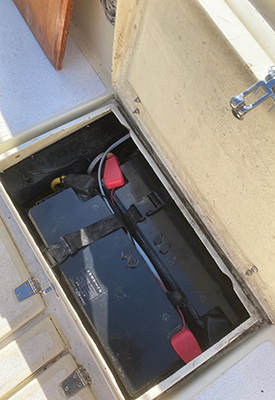

Above left: Batteries 3 and 4 are housed in the starboar side lazarette.
Above middle: Under the hatch, 2 of 4 batteries are installed here.
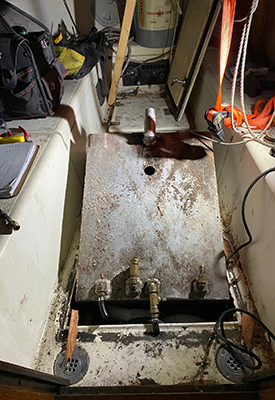
Above right: The bilge area, shwoing the desel mounting locations.
Above left: Fibreglass prep-work done and checking the new engine’s fit
Above middle: The electric yacht engine prepped and ready to go
Above right: New 12V Volthium battery being fitted.
Lots of elements in this project were new. A few takeaways that were quite obvious:
- Electrical engine installers are few and far between, as it’s a technology that is new to the marine world.
- Lithium batteries are still a new technology. There are a lot of questions about how a lithium system can marry-up to other systems.
- Everything about the installation was a positive move forward; easier, lighter, environmentally friendly, and low maintenance. The electric engine fit well with the owner’s lifestyle and sailing goals and usage. There were no single drawbacks that we identified at any point.
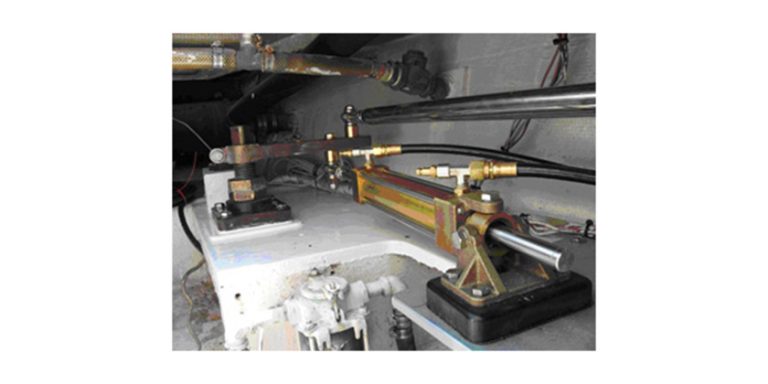
Above left: the final engine installation, including the battery switch and fuse, mounted on the right-hand wall.
Above right: the throttle controls are easily accessible at the helm station.
 To borrow some closing comments from Matt Bera, the boat’s owner, the new Electric Yacht motor provides, “Almost instant, clean, quiet and reliable power…”
“Our contact at Electric Yacht told us that the motor would change our seamanship. We assumed that we would have to improve it to compensate for the power and range of a diesel. Instead, the electric motor is opening up new opportunities to practice more traditional sailing.”
You can read the full Part 1 story in the October issue of Canadian Yachting or by clicking here.
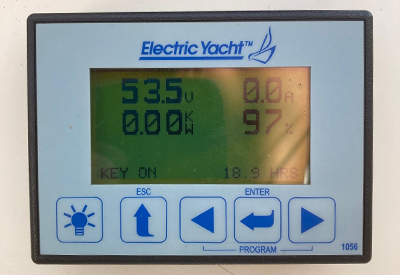
the engine monitor is mounted on the forward cockpit wall.