Avoid Breakdowns and Expenses
 Create a Custom Checklist for Your Boat
We suggest that you invest in about two hours of time from the marine technician at your dealership and together, create a winterizing and summerizing checklist.
The reason for doing this is simple. The technician who winterizes the boat may not be the technician who summerizes it in the spring. The checklist identifies the things you want done and how you want them done.
There may be two different ways of doing the same thing. Both ways may be acceptable but one way might leave you with an open connection or a disconnected hose, resulting in problems out on the water.
Whether it’s a small boat or a large yacht, the boatbuilders try to put as many “features” into a small space as they can and as a result, many fittings, drain plugs, throughhull fittings and even important parts of the engine, can be hidden. It is easy to see the challenge the technician faces.
To research this article, we sought the expert advice of the technicians at Crate Marine in Keswick, Ontario. Crate’s sells Carver, Marquis, Sabreline and Regal boats; they also work on Mercury, Yamaha, Volvo Penta and all sorts of old boats. Crate’s serves literally hundreds of cottagers in Lake Simcoe as well as the boats that occupy the more than 500 slips at their marina.
Technician Richard Cooper walked us through the process.
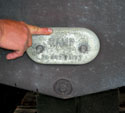
1. Check the anodes. Anodes are attached to the drive unit, rudders, shafts, the hull, the trim tabs and sometimes to the keel. If the anodes have wasted to 30% – replace them. Anodes are inexpensive while new lower units and underwater gear is very costly. Incidentally, for freshwater, we now use magnesium anodes. Magnesium protects aluminum drives better. Salt water still demands the use of zinc. Magnesium disappears in salt water like an Alka Seltzer tablet.
2. Check the hull drain plug. Make sure that there’s no water in the hull. If water got in during winter storage, stop and inspect for structural damage. Replace and secure the drain plug.
3. Go to your outboard or stern drive lower unit. Richard reminds us that oil floats. So, first undo the upper plug that allows the drive oil to drain fully and then, with a catch basin underneath, undo the lower plug on the gear case and drain. The oil should be a clean golden color. If it’s milky, there’s risk that your lower unit has frozen and cracked. Don’t ask what the cost will be.
TIP: The drain plugs often are extremely hard to get out. Richard uses a special high-quality screwdriver with a fitting at the handle so he can apply more torque while vigorously pushing on the screw to avoid camming out the head. He suggests coating the plug threads with Mercury’s Special Lube 101and you can remove the plug more easily in future.
4. If the boat is an inboard, check to make sure the anodes are OK, see if there’s any play in the drive shaft, damage to the propeller and that the cotter pin and lock nuts are all secure.
5. Do a visual inspection of exhaust pipes and openings where animals may have intruded over the winter. Squirrels, mice and even muskrat’s can make a cozy home inside your boat. Crate’s technicians have seen animals eat through the exhaust hose and get right into the boat. Don’t start the boat until you make sure there is no problem. Add a grate over the opening too.
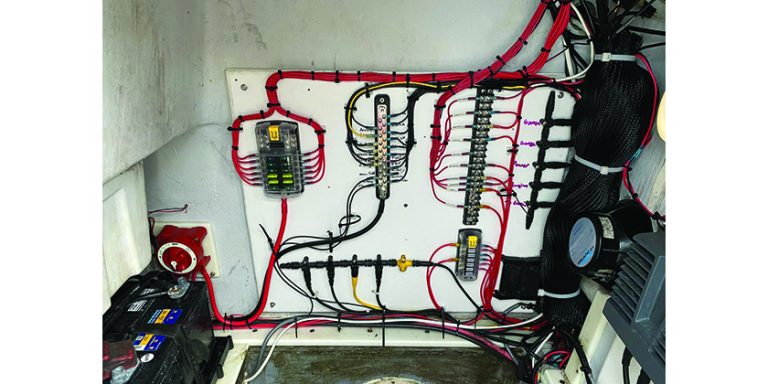
6. Next, open up the engine compartment fully. Look for any evidence of water or oil in the bilge. There should be none. Over the years, rainwater, spilled oil and other liquids get into the bilge. We suggest you clean it up so you can spot any problem. With the engine room clean and bright, hunt for any loose wires. If a wire has come loose, there is danger of electrical spark and fire. Wiring has to be secured immediately.
7. Next, check all circulation hoses and plumbing, making sure they are properly and securely clamped, that fuel lines are double clamped – the Coast Guard requires that – and that all throughhull fittings are secure. The best way is to trace every line from start to end to insure that it hasn’t chafed, worn, or come loose.
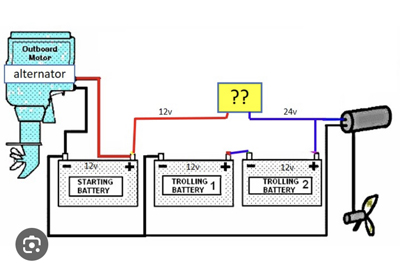
8. Ensure that the battery line was properly disconnected over the winter. A battery that was left connected is probably damaged beyond repair. Use a cranking battery for engine starting. Deep cycle batteries are for electrical accessories. Make sure that everything is properly wired up and secure. Be extra careful about the connections. Accidentally reversing the polarity of the battery or wiring at any point can severely damage the alternator and if your engine is equipped with an electronic control module or ECM onboard computer system, it can be destroyed in a split second. Have your technician make sure that everything is clearly marked. Also, make sure the battery fluid levels are correct. Add fluid as needed.
9. Check the fluid levels in the power trim system (if you have this on your boat), the dipstick for engine oil level and quality, the dipstick on the power steering pump (if one is fitted) and visually inspect for evidence of oil leakage that might suggest a blown gasket.
10. Next, go to the engine drive belts. Make sure they are tight, not frayed. Also check for rubber dust – a telltale for belt problems. Some engine belts will have as much as three quarters of an inch of play while a serpentine belt with a tensioned should have no play.
11. Check your fuel filters and water separators. As you checking this with your qualified marine technician, you’re probably getting a valuable education in how your boat works and how to keep it working well. Hopefully this is enjoyable and not tedious.
12. Inspect cracked blocks – where things get serious. Most engines have a drain plug on either side of the block to drain cooling water. Same with exhaust manifolds but there are many variations. Get to know your boat specifically. If for any reason, the water didn’t fully drain out of your engine last fall, it can freeze and crack the block or worse, crack through a water passage in the head. An internal crack and resulting pressure water leak means that when you start the boat for the first time this year and begin driving it, the damaged area can be filling the inside of the engine with water. The pressure will build quite dramatically and a few minutes later, you will have a geyser of oil and water shooting out of the dipstick, the oil filler cap and other openings. An engine that has suffered this, is probably scrap.
This is why you and your technician need to locate and agree on exactly where the drains are located, whether they are to be left open or closed once the block has been drained and so on. Just forgetting to close one, can pump water into the bilge and even sink the boat if run long enough.
13. Richard offered us a couple more tips. When you first start the boat in the summer, the dashboard instruments should immediately show somewhere between 13.2 and 14.5 volts of battery charging on your voltmeter. Anything over 17 volts reveals that your voltage regulator has been burned out. Stop the boat.
Your oil gage will almost immediately show 40 psi oil pressure and a max of 60 psi when the boat is running at speed. Also, outboard engines should have a stream of cooling water appear moments after starting the engine. Inboard engines will blow water out their exhausts. Because everything has been drained, expect it will take a few seconds to a few minutes for water to appear. In a big inboard engine that may be fitted with muffler systems, it can take as much as three minutes before cooling water starts to blow out the exhaust. If no cooling water appears stop the engine immediately. Richard holds his hands on the top of the exhaust risers. If it feels hot, stop the engine.
14. Hydraulic steering is another thing to check before taking the boat out on the water. With a hydraulic system, you should be able to spin the wheel all the way to “lock” in both directions. If the wheel keeps spinning, you don’t have hydraulic pressure and that means you don’t have steering.
15. Specialized issues for inboard engines include the fact that the stuffing box and shaft log should only drip a little bit of water. If you have a dripless shaft log, it needs cooling water. Make sure it’s not getting hot and that the cooling water connections are secure.
16. Then there are the onboard water systems. Check all fittings carefully, pump out any plumbers anti freeze and run clear water through the system to make sure all the tanks are fresh and clean. Never use ethylene glycol antifreeze like you do in your car. Except in “closed cooling systems” ethylene glycol can be environmentally disastrous. It should never get in the water.
In really large boats, the checklist becomes critically important because such yachts are often fitted with things like icemakers on the bridge or onboard laundry appliances. Naturally, these have water connections as well and are equally subject to risks of freezing damage in the winter.
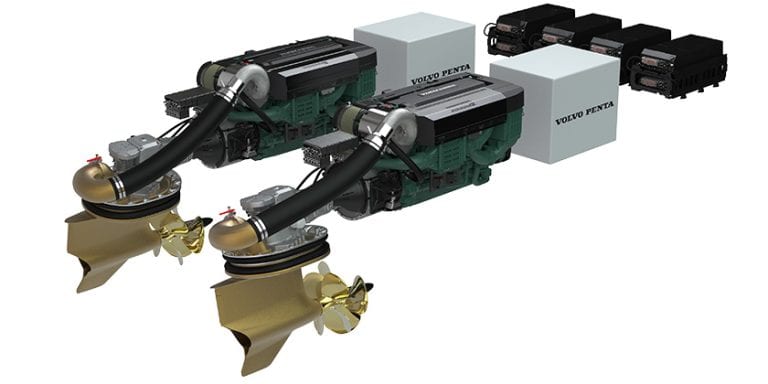
17. Generators are a full repeat of the process because that too, has an engine, cooling lines and pretty much all the same needs as your regular main engines. These all have to be checked.
Once you have the checklist assembled and detailed [perhaps even putting photographs in to illustrate where hidden things are located] you should be in the position where the technicians can completely avoid winter damage for a trouble-free summer on the water.
Keep your checklist onboard at all times and remember, when you go to sell the boat, it’s proof of how well and diligently you have maintained the boat as an owner.