Pitoraq: Deck Repairs Part 2
May 14, 2020
By Graham Heath
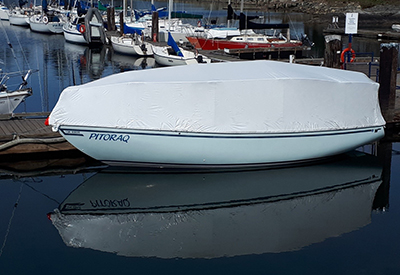
As another harsh Victoria winter came to a close, the deck repair and refinishing continued with Pitoraq in the water but still under her shrink wrap cover.
The quarantine ark floats!
The deck repairs were complete and non-skid sanded and filled in and an overall coat of epoxy primer on the whole upper deck. Now came the time to start building up the finish coats. I decided to depart from the original all light blue upper decks to a combination of light blue cabin sides and coamings and white horizontal surfaces. The idea here was to keep the boat looking blue in profile but not having to colour match the non- skid to the finished surfaces.
For materials I looked for simple and easily available DIY products, settling on Interlux Brightside for the smooth areas and Kiwi Grip for the non-skid. To get an approximation of the original “Pacific Blue” I mixed 2 parts Brightside White to 1 part Brightside Light Blue. For the smooth areas of the decks adjacent to the non-skid I settled on Brightside Off White mixed 1:1 with flattening agent to make it semi-gloss. To my eye the tone of the Off White is close to the straight White Kiwi Grip, although the paint is a shade darker they match well in bright sunlight.
 Playing with paint colours trying to get close to the old blue gelcoat in the background.
With the paint in hand and copious amounts of masking tape and sandpaper I went about painting. First the Off White around the deck border to the toe rail and all the hardware patches, then the Blue on the cabin sides. I applied 3 coats or more using the roll and tip method and sanding between coats. Very time consuming and difficult trying to keep the dust and lint down.

Blue cabin sides and white decks, almost ready for masking and non-skid.
With the paint complete, the next step was to try my hand at Kiwi Grip. I had not used the product before but the instructions are really good and easy to follow and I had a lot of helpful input from friends who had used it before. Starting small, I did the anchor and foredeck hatches at home in my garage to get some practice spreading and texturing with the loopy roller they give you. I learned a few things in the process.
1) Spreading with a notched trowel is a good way to get even distribution but it is important to select the right trowel, a v-notch trowel with pointy serrations works better than one with flat tips. The wider the “stripes” of material the trowel lays down, the more back and forth rolling you need to do to blend it into an even texture.
2) Unlike rolling paint, the loopy roller does not distribute the material around very well, so you need to apply it evenly with a trowel or brush.
3) Twisting or sliding the roller sideways, even slightly, smears the texture and leaves an obvious mark. Light passes with no pressure on the roller yields an even texture.
4) Splatter happens, masking paper is good.
 (Right) Kiwi Grip spread with a notched trowel. Finer notches would require less rolling.
 (Left) Kiwi Grip rolled with the loopy roller, looks really rough but it settles a bit as it dries.
 Foredeck hatch done.
Having completed my practice runs in the garage, it was time to take the show on the road. To prep the boat decks I did a lot of masking around the margins of the non-skid and where the tracks, stanchions and other hardware mount on the deck. Making a template for some of the shapes like the stanchion bases saved some time but it was still a long process. One suggestion I was given was to Kiwi Grip everything and just install the hardware on top but I have a history of doing things the hard way.

Masking tape art.
Another suggestion that I didn’t follow was to have 3 people to apply the Kiwi Grip, one spreading it, one rolling and one peeling the masking off. In the confines of the enclosure and with social distancing suddenly becoming mandatory it became clear I would be singlehanding. It worked well to break it up in in sections and do one or two, then get off the boat before stepping in wet paint.

Laying out Kiwi Grip, single handed. Starting from the bow working backwards in 3 foot sections, spread the material, roll in the texture, reach forward and peel back the masking, cut it off and dump it in a paper bag behind your heels. Shuffle back another 3 feet and repeat.
Lots of holes waiting for important things to go back on.
More than anything I am looking forward to getting Pitoraq rigged up and out sailing before we forget how.