Ask Andrew: Electrical Installations – Part 1: Electrical Connections – basics and how-to’s
Jan 10, 2019
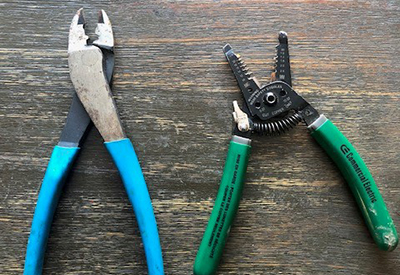
1. Wire strippers and crimpers- the two essential tools for correct electrical connections.
Winter is a great time to look at some of the hidden spaces on your boat – to take stock of what is aboard, areas of improvement and ways to upgrade.
One of the most common jobs that I’m asked to look at are electrical installations and upgrades. Surprisingly, the majority of these types of jobs are to ‘clean up’ the wiring of years past – when electrical standards were more fluid, and jury-rigged upgrades have been added and adapted over multiple owners and contractors.
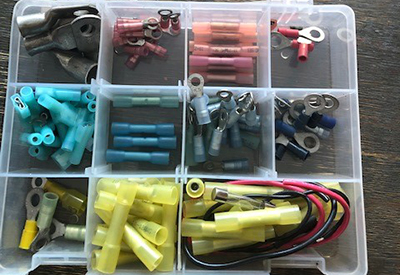
2. A set of butt connectors and ring terminals for varying wire sizes and applications
A danger zone that I often see, are poor connections in electrical wiring. This could be wire-to-wire (a connection, splice or repair), or the end of wire to a terminal connection. Improper connections can break or vibrate loose, can cause electricity to arc causing melting or fires, or can allow moisture, dirt and corrosion to enter and impede performance.

3. Stripping the wire end
Let’s look at how to do it properly:
There are a few basics tools and supplies needed for a quality electrical connection:
Appropriate wiring – tinned copper, multi-strand wire, at the correct gauge thickness for the application
Connectors and terminals – marine-rated butt connectors and ring terminals
Stripping and crimping tools
Steps:
1) Select appropriate gauge wiring for the application, based on the amperage that the appliance will draw, and the distance between the power source and the appliance. Check wire size charts and ampacity charts first.
2) Select the appropriate connectors – to match the wire size and connection holes
3) Select the appropriate size shrink-tubing to cover the repair
4) Have appropriate wire stripper, crimping and heat tools at the ready
5) Strip the wire end to the appropriate length. Dry fit into the connection
6) Place the connection on the wire end and crimp in place. Pull-test the wire to confirm that it’s held in place
7) Slide shrink-tubing over the repair and heat in place (or use a connector with shrink-tubing ends).
8) Done! Next connection.
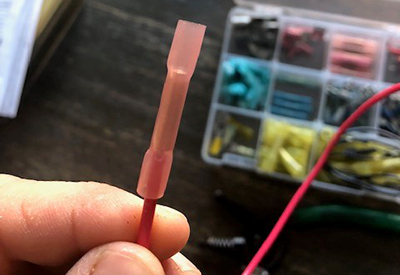 4. Choosing a butt connector
Some final Do’s and Don’ts for electrical connections:
Do’s:
1) Use the correct size wire for the application, stripped appropriately, with the correct size connector for the wire
2) Use marine-grade products, including wiring and connections (These are designed to resist moisture/humidity and vibration. Auto or generic connections don’t offer the same protection.)
3) Line up and completely crimp the connector
4) Use shrink-tubing to protect each connection from exposure to moisture, dirt and vibration.
5) Perform a pull test after each connection to make sure that it is strong
6) Label and colour-code wiring where appropriate
7) Use appropriate wire runs, zip ties and supports to keep the wire runs bundled and neat in appearance
 5. Crimping the connection
Don’ts:
1) Use solid wire
2) Use Marr or twist-type connectors
3) Leave wiring hanging or unprotected
4) Leave unused wiring in place
5) Use inappropriate wiring colours or labels
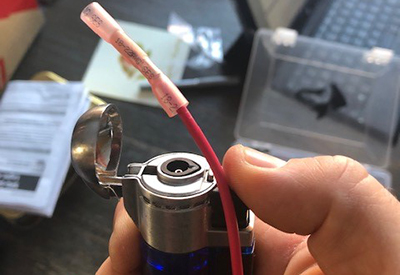 6. Heating the shrink-tubing
 Andrew McDonald is the owner of Lakeside Marine Services – a boat repair/maintenance firm based in Toronto. Andrew has worked in the marine industry for 12 years and is a graduate of the Georgian College ‘Mechanical Techniques – Marine Engine Mechanic’ program.