Ask Andrew: Changing a water impeller
June 10, 2019
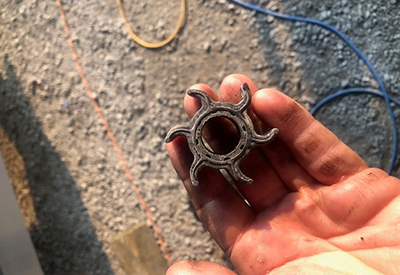
An older worn-out impeller. Note that the vanes are bent – a new impeller will have straight vanes that need to be bent in place to fit.
If you’ve spent any time in a boat yard during spring commissioning season, you won’t find it out of place to hear the roar of the engine, a cloud of blue smoke erupt, and a mechanic craning over the stern to look at the exhaust. What they’re looking for are signs of water exiting with the exhaust: Water exiting means that water is being sucked up and pushed through the engine appropriately – this is the only visual clue that the raw water cooling system is working appropriately.
This is true for inboards, outboards and stern-drives, whether power or sail.
The marine engine’s cooling system is pretty basic. Water is sucked up from the water surrounding the boat, is run through the engine, and out through the exhaust system along with exhaust gases. There aren’t too many complicated parts to the system, and one of the seasonal maintenance tasks that is necessary is to check the impeller: A small rubber device (similar to a paddle-wheel) that is spun by the engine, sucking water up, into and through the engine.
The impeller is pressed tightly into the housing of a water pump, and over time it loses its fit, and the rubber vanes can crack or degrade. Additionally, any overheating of the water pump will cause the impeller to break up into small bits. The impeller is the only device to provides the suction and pressure to move the water necessary for engine cooling – and without it working correctly, the engine will overheat.
Depending on the type of engine, the impeller could be located in a few different places:
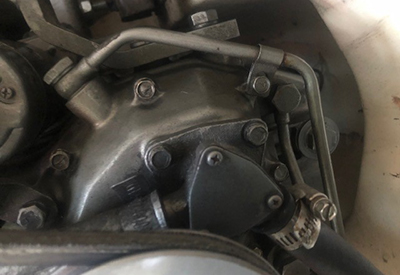 The triangular shaped plate covers the impeller on this engine-mounted water pump on a Yanmar diesel
Inboards – as found on most sailboats, and on powerboats with a prop and shaft set-up. To find the water pump, trace the hose that runs from the seacock (where water enters the boat), to the first place that it clamps onto the engine: This will be the water pump. Behind the flat plate on the face of the water pump will be the impeller
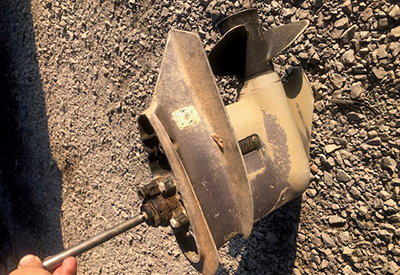
The lower unit of an outboard engine. The water pump is mounted at the top of the lower unit, at the base of the shaft.
Outboards – Outboards draw cooling water through a vent at the bottom of the drive leg. Half-way up the leg of the outboard, there are a number of bolts that connect the lower unit to the upper. The water pump is found inside the leg, between these two halves. To get to it, the bolts securing the lower unit need to be removed (the owners manual should be consulted), the lower unit taken off, and the plastic casing of the water pump unbolted. The impeller is found beneath the casing.
Sterndrives: Stern drives function similar to an outboard drive leg: Water is sucked up through the vents near the propeller, and forced through a water hose into the engine. Each major stern-drive manufacturer uses a different way to mount their water pumps
OMC: The water pump is behind a casing at the top of the stern-drive. Three bolts hold the casing in place. Once removed, the water pump is accessible. A few bolts later, the impeller can be accessed and changed.
Volvo: These stern drive units have vents similar to outboards and OMC drives, but the water pump is mounted to the front of the engine. To locate it, follow the hoses that run from the stern drive, along the underside of the engine. The water pump can be taken off the engine by removing a few bolts. The back of the pump can then be taken off, to access the impeller
Mercury/Mercruiser
Alpha: Alpha drives have a set-up similar to most outboards: The lower unit of the drive needs to be removed to access the water pump
Bravo: Bravo drives are similar to Volvo drives, with an engine mounted water pump.
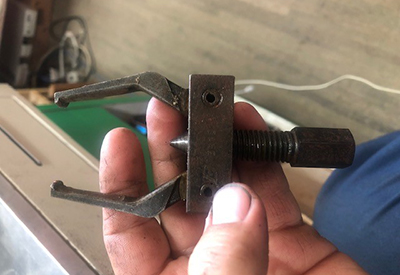 A handy tool to remove an impeller. The forks pull on the back of the impeller as the screw is turned (pressing on the water pump shaft), forcing the impeller out.
When removing an impeller, space is sometimes limited. There are a number of handy tools that can be used to extract a stuck impeller (in a pinch, a pair of screwdrivers tend to work well). If the impeller has cracked, or has pieces missing, try your best to find any missing pieces. If they aren’t visible, they may have made their way into the engine – so take care to flush the engine through to ensure that rubber bits aren’t blocking any cooling passages!
When installing the new impeller, there are a few things to watch for:
1) Take note of which direction the impeller blades were bent on the original impeller. Try to mount the new impeller with vanes bent in the same direction
2) Most impellers that are mounted to a shaft are held in place by a small metal key. Make sure the key is replaced in the same orientation that it was removed.
3) Lithium Grease is your friend – it will help you to slide the impeller in place, and will help it to turn freely once installed.
Most service shops with a parts department will have ready access to impellers of all shapes and sizes. If in doubt, the engine’s model and/or serial number can be used to easily look it up.
Understanding how your engine’s cooling system works can allow you to catch and prevent costly damage in the event of a problem – and the ability to check and change an impeller on your own can allow you to maximize your time on the water this boating season.
 Andrew McDonald is the owner of Lakeside Marine Services – a boat repair/maintenance firm based in Toronto. Andrew has worked in the marine industry for 12 years and is a graduate of the Georgian College ‘Mechanical Techniques – Marine Engine Mechanic’ program.
