Winterizing Tips for Your Diesel Engine
 Just this past winter, my own transmission cooler, which should have been mounted in a more upright position, froze and split the casing, causing water to steadily leak into my bilge until we discovered the problem and corrected it.
By “corrected” I mean dump money into replacing a perfectly good transmission cooler just because I thought it was fully drained when it wasn’t. I’m sure many of our readers can share stories of that one hidden little drain plug. I guess this is simply our way of saying that you should never tackle a job like this without the proper shop manual to ensure that you have located all of the winterizing points, if you’re going to do this job yourself.
That’s a nice segue into suggesting you turn critical work like winterizing your engine over to a qualified marine technician who knows your type of engine. This is more than just a good idea. If you have a new boat that is under warranty, doing the work yourself could void that warranty and you certainly wouldn’t want that.
On the other hand, there are two very good reasons for wanting to read this article and to get to know the winterizing process for your engine.
The first is that whether you do the work yourself or not, it makes good sense to understand your engine and where its critical points are, like drainage plugs, incoming cooling water, outgoing exhaust, and so on. With this understanding, you will feel more comfortable cruising to more remote locations. The second reason is that you will also have a better understanding of what the marine technician does to winterize your engine for you.
Luckily, when it comes to winterizing your diesel engine, the process is fairly straightforward. You should always have a shop manual for your engine for many other reasons anyway, so with that and a crewmember as helper, go ahead.
To help us cover off the main points, we spoke to Jaap Breugen at PDQ Yachts in Whitby, Ontario. All the boats that PDQ builds are equipped with diesel engines and Jayp took us onboard a magnificent Antares 44 sailing cat and walked us through the winterizing procedure.
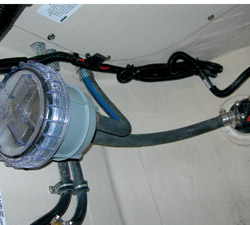 1. We assume that your boat is hauled out for the winter and on dry land. To begin with, locate the seacock that leads to your raw water strainer for the cooling system. Open the seacock and allow the water to drain out of the strainer. Then, close the seacock again.
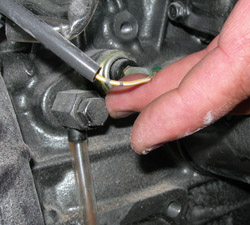
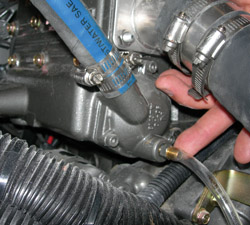 2. Next, open the bleeder drains on the engine block to drain the cooling water that’s already in the system. The Yanmar diesel that we used as our example happens to have two drain plugs. But, remember that your engine may have only one or perhaps has several and all of them must be located and drained if your boat is to be stored in cold weather. Consult your service manual to locate them all and make a note of their locations on the engine with a quick blast of spray paint for convenience in the future. Then, open these screws or valves and allow them to drain until the water stops. The final step is to now close those drain plugs.
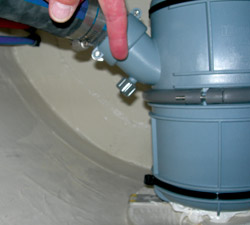 3. Next, drain your transmission cooler, if one is installed in your boat and then move on to your water lift muffler, again assuming that you have one fitted to the boat and locate all of the drain plugs. You would expect just one, but the muffler on the PDQ happened to have two drains. NOTE: This component is probably NOT included in your shop manual. Open the drain plugs and allow all of the water to run out. With that done, leave only the very lowest one on the water lock open. We’re going to run anti-freeze through the system until it bleeds out this low plug, so put a small pan or catchment basin under that drain.
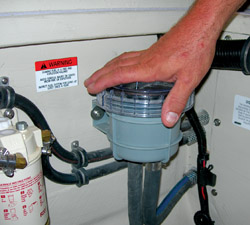 4. Return to the raw water strainer and unscrew the lid. It should be empty, and we are going to fill it up with nontoxic, plumbing antifreeze. This will be pink in color. (Other types of antifreeze can be green, orange or blue, but only the pink colored plumbing antifreeze is nontoxic). Get your pink antifreeze ready and begin pouring the antifreeze into the raw water strainer while your assistant starts the engine up.
The antifreeze will keep the water pump from burning out and it will draw the antifreeze through the system as you pour it in. In a few moments you will see pink antifreeze begin to come out of the drain on the water lift muffler (or out the boat’s exhaust system, if no muffler is fitted) then you know that the antifreeze has been drawn all the way through the system. Stop the engine, close the valve on the water lift muffler to keep the antifreeze from flowing out, then top up the raw water strainer with more pink antifreeze, remove the antifreeze in your catchment container and clean up.
Next spring, follow this same procedure to safely dispose of the pink antifreeze so that you don’t put it into the lake.
If you have twin engines, you have to do both of course and it goes without saying that the engine is only one of the many systems on a larger yacht. They all need to be prepared for storage, especially any enclosed space where water could be trapped. You still have to disconnect your battery. Remove that to a dry location where you can recharge it periodically to prevent damage over the winter.
Shut off the fuel supply valve before you leave the boat and use the manufacturer’s recommended fuel conditioner or stabilizer. Generally, it’s best to leave your tanks nearly full to prevent condensation from entering but leave some space for expansion as the hot weather returns.
All the other onboard systems such as fresh water and waste systems, transom showers, your generator engine and any areas of the hull where water could be trapped, all need to be looked after.
None of this is hard but you can see, there are reasons for the growing popularity of heated storage. Better yet, cruise to the Caribbean and just skip the whole thing!

