Ask Andrew: Winter battery storage

Nov 23, 2023
a great time to clean up wiring and terminal connections
The complexity of modern batteries and electrical systems aboard modern boats is contrasted with decades of ‘this is what we’ve always done’.
The ultimate goals of battery care are three-fold:
- Protecting winter damage due to freezing
- Ease of spring starting, and confidence that voltage will be available when required
- Long term health and longevity of batteries – as they can represent a large investment
I would also add a few other considerations: ease of dealing with them spring/fall; making the winterizing and spring commissioning process simple and straightforward, and avoiding wiring and reconnection issues.
Step #1: Always charge your batteries before storing for winter. This is essential for a few reasons.
a) a full charge when stored should mean a full charge when reconnected in the spring
b) a full charge means – in the case of lead-acid batteries – that the solution inside the battery is sulphuric acid (which won’t freeze over the winter). If the batteries are left depleted (or partially depleted), the solution inside will be mostly water – which will freeze and cause damage
Step #2: Remove the connections from the negative post from each battery.
This will serve to disconnect each battery from any common ground areas: Common posts, connections with other batteries, and the vessel’s main ground. It also severs the connection between bonding and grounding systems and the batteries, which prevents any accidental drains (parasitic drains) over the winter.
If the negative post is disconnected, the battery can’t discharge, or drain through accidental means. The positive post can remain connected.
Step #3: tie or label the connections to be removed.
A piece of tape or zip-tie will do. Some people label how many connections are on each post, others label each wire individually. The purpose remains the same: To ensure that each wire gets reconnected in the spring in the right way, and to make sure that no wires are missed in the process.
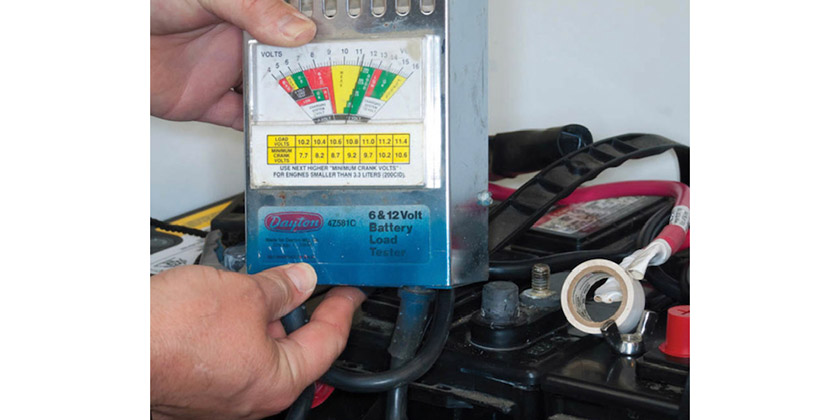
load test each battery after disconnecting
Step #4: Load test each battery.
Ensure that the voltage is stable (a fully charged battery will show 12.6V), using a multimeter. A load tester is a device that simulates a load and will show the battery’s health when pushing voltage, rather than simply at rest. This is a better indicator of overall battery health.
Step #5: Revisit your battery charger settings.
Make sure that, in the case of multibank smart chargers that the correct battery type is selected, and that batteries are equalized.
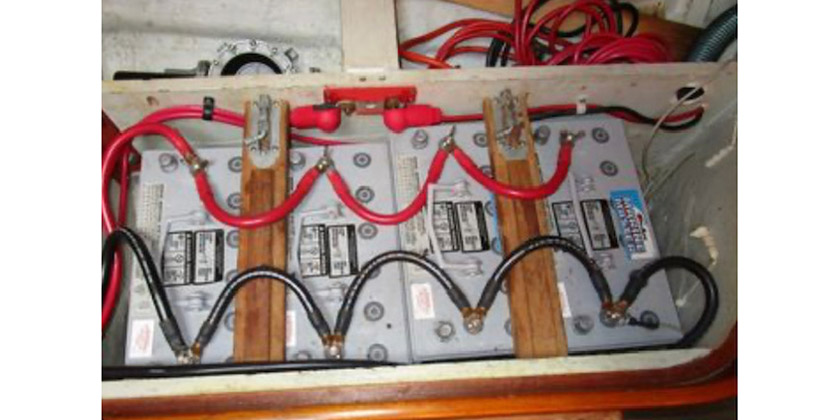
remove and label each negative cable
Step #6: Review your battery wiring.
Try to keep the wiring ‘equal’ on larger battery banks (this means that the positive and negative cables that travel to the load are spread across the bank, and not coming off of just one battery). Rotate the batteries, if necessary. Ensure that no more than 4 connections are on each battery post (per ABYC standards). Check the state of ring terminals and connections – replace and repair as necessary.
Special considerations:
- Your boat’s batteries do not have to be removed from the boat. In my experience, the effort of removing and replacing them each fall and spring shows no real long-term advantage or additional lifespan to the average boat battery
- Keep ventilation in mind. As batteries are depleted and re-charged, the area that they sit needs to be well ventilated. This remains true over the winter – so ensure that items stored in the cabin (cushions, sails, etc) aren’t covering over the ventilated areas where batteries are stored.
- Keep the batteries dry. Ensure that moisture control products are used to avoid condensation build up.
- I’ve tried to keep these steps as generic as possible – all hold true for Lead-acid, AGM and Lithium

Andrew McDonald is the owner of Lakeside Marine Services – a boat repair/maintenance firm based in Toronto. Andrew has worked in the marine industry for 12 years and is a graduate of the Georgian College ‘Mechanical Techniques – Marine Engine Mechanic’ program.