Making Networks Work – It Can Be Done!
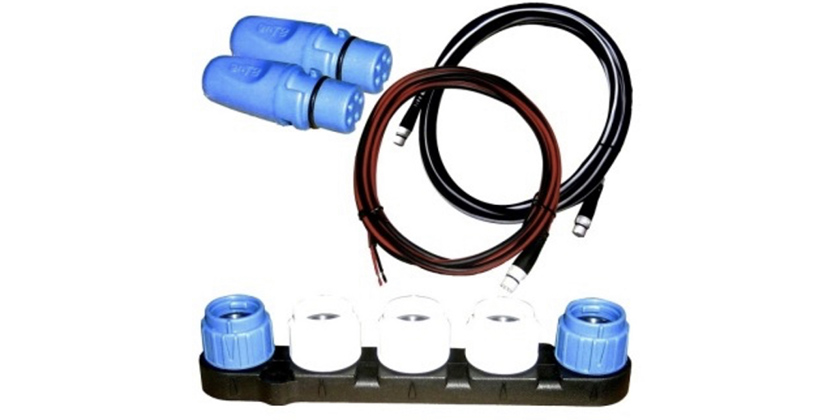
A starter kit for a network, packaged with a new Multi-function
June 25, 2026
By Andrew McDonald
Don’t let electronics defeat you.
A few years ago, I discovered a love of Apple products. I recently replaced a laptop, and upgraded to the newest Apple product that was available. I was quite pleased as I opened the box and started planning how to get my data from my old computer to the new one.
Here is where things went awry: All the connections and plugs are different from what I’ve been accustomed to. I struggled to connect printers, removable drives, etc – and found myself needing to source and buy adaptor cables to make it work the way that I wanted it to. It was a frustrating start.

I had flashbacks to this experience on a recent job, upgrading an autopilot system on a client’s sailboat. The documents that came with the new system described several different potential set-ups, and make it seem quite simple and straightforward to install: Install the new ‘computer’, install a fluxgate compass, install a display, install a rudder angle indicator. Connect them all together in a network. Simple.
The reality required a lot more planning and understanding of how systems work. The old autopilot, and instruments were patched together – multiple manufacturers, using two separate network types. The upgrade was possible but required the introduction of another manufacturer and a third network type. In more practical terms, it also means the research, planning and purchase of extra cables and adaptors to allow everything to marry-up.
The cost of the cables and adaptors alone increased the total cost of about 18%
I don’t think that this is uncommon situation, and I would guess that this leads to a lot of frustration, and an end functionality that isn’t ideal. I’d like to explore some broad steps in how to plan an installation to integrate new technology with older instruments and networks, from start to finish.
Steps to success.
First, it’s important to understand what your desired result is to be. There are common desired outcomes, and I’ve listed them from the most difficult to plan, to the easiest to plan:
i) Integrating a new element into an existing network of displays, and transducers
ii) Replacing/upgrading a network, and marrying up transducers and other elements into a new system
iii) Replacing everything and creating a whole new network.
Second – understand the requirements of the new upgrade. This could be a new multi-function display, a network upgrade (say from Seatalk or NMEA0183 to NMEA 2000 or Seatalk ng). A full understanding of its requirements is important in the planning process.
Third – Compare the systems that you want, with the systems that you have. Take everything apart. Trace the wiring. Review online forums to see other’s experiences.
Fourth – make a list of the differences, requirements, and the connection problems that need to be solved. During this step, you’ll likely note a few new problems that you’ll need to find creative solutions for. Here are a few suggestions to help to overcome these differences:
a) realize that the manufacturers struggle with this just as much as the end user – so adaptors, cables, connectors and solutions exist between network types and common brands: its just a matter a getting the right combination of adaptors to make it all work.
b) don’t cut/splice wires to find a quick fix. It may work temporarily but could cause bigger problems down the line. Use properly fitted adaptors instead.
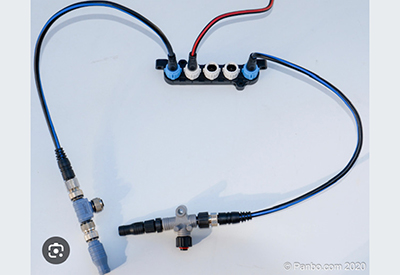
c) Start with the network (the common bond that links everything together and allows devices to talk), and work backwards from there. This network maybe NMEA0183 (an older style, using 5-wire connections), NMEA 2000 (a proprietary plug-and-play connection type), Seatalk 1 (older version from Raymarine), Seatalk ng (New Generation from Raymarine), Garmin, Lowrance, etc. Use the most up-to-date network type available.
d) Once you understand the common network to be used, you can begin linking all of the other displays, transducers and parts to it.
Fifth – link everything together, check the power sources (and fuses), and test it. When testing, take a gradual approach to identity which items are being read on the network and which items aren’t. Try to narrow down when there are ‘power’ issues vs ‘connectivity’ issues.
Finally – Share your story: If you found value in an online forum, or with a group of troubleshooters at your marina/yacht club, share the problems and the solutions that worked. Take it further by sharing your story with the manufacturers involved, so that they can continue to find creating solutions. As new generations of boat equipment and electronics evolve, the connectivity problems will only multiply.
Enjoy your upgrades and be safe this summer!