Ask Andrew: It used to work – but now it doesn’t! Common remedies to common problems mid-season
July 11, 2017
For most of us – this is the time to make the most of the boating season – launch and set up are done. Systems have been recommissioned. Let the fun begin!
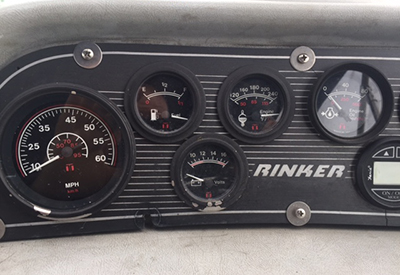
Common gauges include RPM, fuel, temperature, oil pressure and battery voltage
But wait……on what should be a relaxing weekend aboard, that thing has stopped working (in this case, ‘thing’ means any part that used to work, but now doesn’t).
Let’s look at a few common things:
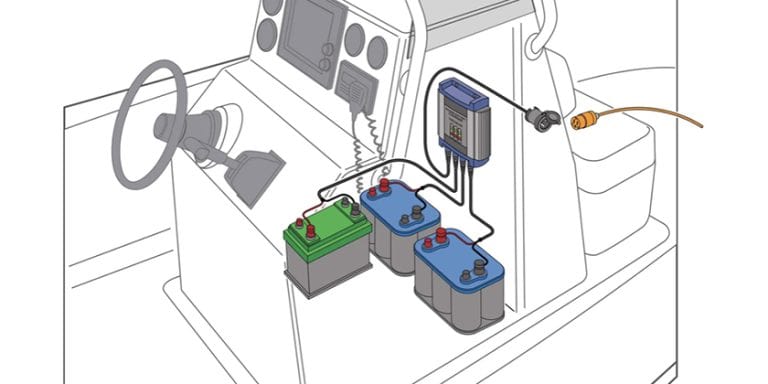
Batteries: They may no longer accept a charge from an alternator/battery charger, or they don’t hold enough voltage to sustain the electronics that they should. Most marine type batteries for everyday starting and house purposes are serviceable: meaning that they can be tested under load for correct discharge of voltage and reconditioned (usually by adding distilled water to conventional lead-plate style batteries) when they don’t function properly. Before servicing batteries, they should be properly tested by checking voltage (using a multimeter for a base reading), and followed-up by testing the voltage under load (using a battery load tester). Be sure to observe safety precautions and wear appropriate protective devices (gloves and safety glasses). A qualified marine service shop can take care of battery service for you – or you can follow the maintenance procedures available from the manufacturer. This conventional lead-acid marine battery has two ports that can be opened to allow distilled water to be added as part of a reconditioning and maintenance program.
Gauges: RPM, Speed, Fuel, Temperature and oil pressure gauges are common to most boats and are each relatively simple devices comprised of the gauge (the dial that gives the operator information), the sending unit (the part of the engine that provides information to the gauge), and the wiring between the two. It’s a relatively straightforward procedure to test each component: The gauge is tested for power to it, and that it is correctly grounded. The sending unit is then tested (by testing the resistance and/or voltage to and from the unit by using a multimeter). Next, the wiring between the gauge and sending unit is checked and tested to ensure that it is carrying the information correctly between the two. In most cases the engine manual should be consulted for complete testing procedures.
Windows, ports and hatches: over time, they begin to leak! Often an annoyance, sometimes bigger leaks become detrimental to bilge water levels and the integrity of fiberglass. Whichever the case, use an appropriate marine sealant or caulking to seal up any gaps that allow water to enter the cabin. Seals and gaskets around hatches and ports are often an entry point for water and should be replaced when wear is visible. Likewise, hatch frames and hinges will wear, bend and rust which allow the weather in! Ensure that you check the surrounding fiberglass and gelcoat when filling a leak – caulking and sealants can only do so much. When large gaps or fiberglass damage is evident, a proper fiberglass patch may be necessary before caulking or sealing. Consult with your local marine store or chandlery to find the right caulking, sealant or gasketing materials for your application.
Electronics and Navigational equipment: Modern systems can be quite complicated and require factory-trained specialists to diagnose and repair problems. Consult a qualified repair tech to address concerns with electronics and navigation equipment
Trim tabs and stern drives: Movement of drives and trim-tabs is facilitated through hydraulic pressure – check fluid reservoirs to ensure that fluid is at the correct level and top-up as necessary. Many stern drives also have adjustable limit switches which allow adjustment of how high or low the drive will trim. Stern drives have a ‘trim limit switch’ on the side of the drive’s gimbal ring which allows adjustment to the limit that the drive can be trimmed up and down. Two small screws on the trim limit switch can be removed quickly for adjustments – the limit switch is tilted one way or the other to adjust the up and down limit of the stern drive. Your engine or stern drive manual will provide step-by-step instructions on how to do this – or a qualified repair tech can make adjustments to these systems as required.
Bilge Pumps: these devices pump excess water from inside the boat, overboard. Failures tend to occur in two ways: they wear out from overuse or age, or they pick up debris and dirt from the bilge which clogs the pump and burns it out. Keep your bilge as clean and dry as possible, inspect the pump when possible to ensure that the vanes are clear to turn properly and check to make sure that float switches work as designed. If your bilge pump works intermittently or stops working completely, have it serviced or replaced.
Alternator: The alternator charges the batteries as the engine runs and battery voltage should read between 13.5 and 14.5 volts as the engine is running (driving the alternator). If the batteries aren’t charging at this rate, there may be a problem with the alternator. Repairs may be as simple as tightening a belt, or may require wiring replacement or a more complete servicing.
Starter: When the key is turned, battery power turns the starter motor, which turns the boat’s engine and lets it roar to life. Starter motors are simple in design, but require many components working together properly to function as designed. Consistent boat starting problems should be diagnosed by a marine mechanic. Most starter problems are attributed to lack of power in the starter battery – keep it charged and well maintained to avoid problems when the key is turned.
 Andrew McDonald is the owner of Lakeside Marine Services – a boat repair/maintenance firm based in Toronto. Andrew has worked in the marine industry for 12 years and is a graduate of the Georgian College ‘Mechanical Techniques – Marine Engine Mechanic’ program
